How did I get into learning bobbin lace?
On a rainy day in 2024, I was on a walk with my mother. We briefly ducked into our local community center to escape the weather for a moment. A stack of free books got our attention:
One of them was John Seymour’s “Forgotten Household Crafts,” and the rich illustrations drew me in. I brought it home.
As I rifled through it later, this image caught my immediate attention:
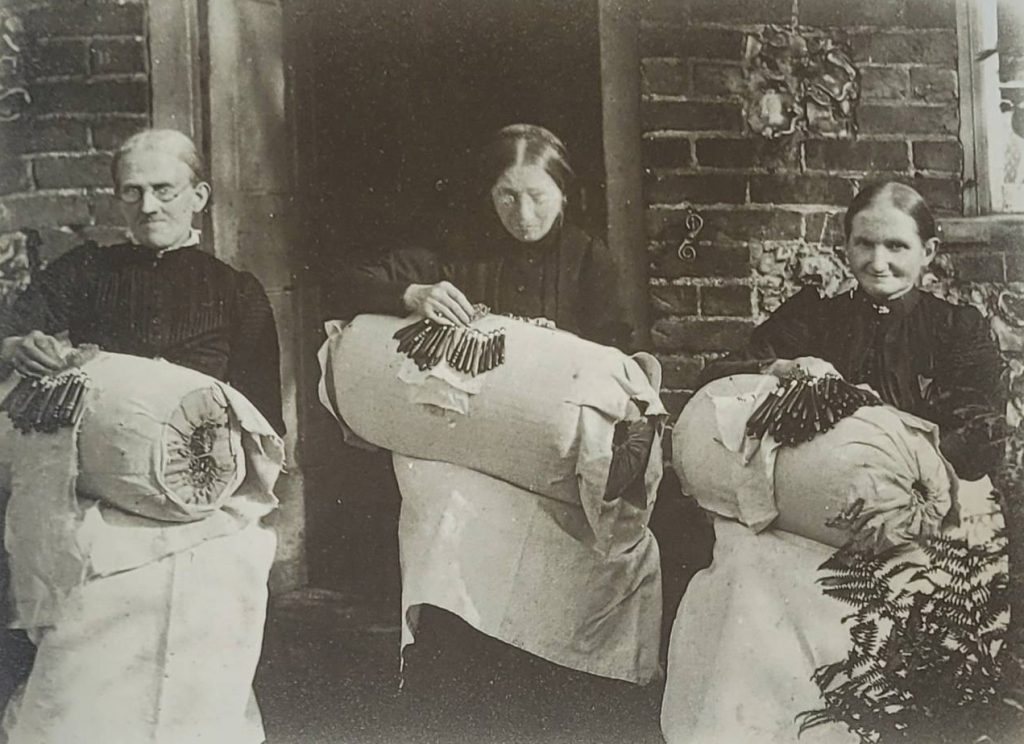
The three women were making lace. But… how!?
The very thought of making lace yourself seemed rather… crazy. After all, lace is ever so delicate, and yet, sturdy enough to be sewn on clothing or worn as accessories, like scarves or veils.
The amount of bobbins in the picture intrigued me. How does it work? How do you make bobbin lace?
I turned to my mother and showed her the image. “Here,” I said, “I need to learn this.”
My parents are German. So, I decided, I should learn the German version of bobbin lace, called Klöppeln. I had come across the word before, but it had always seemed like something old; something a granny would do. Now, I was scouring ebay for cheap, used bobbin lace materials.
What do you need to learn bobbin lace?
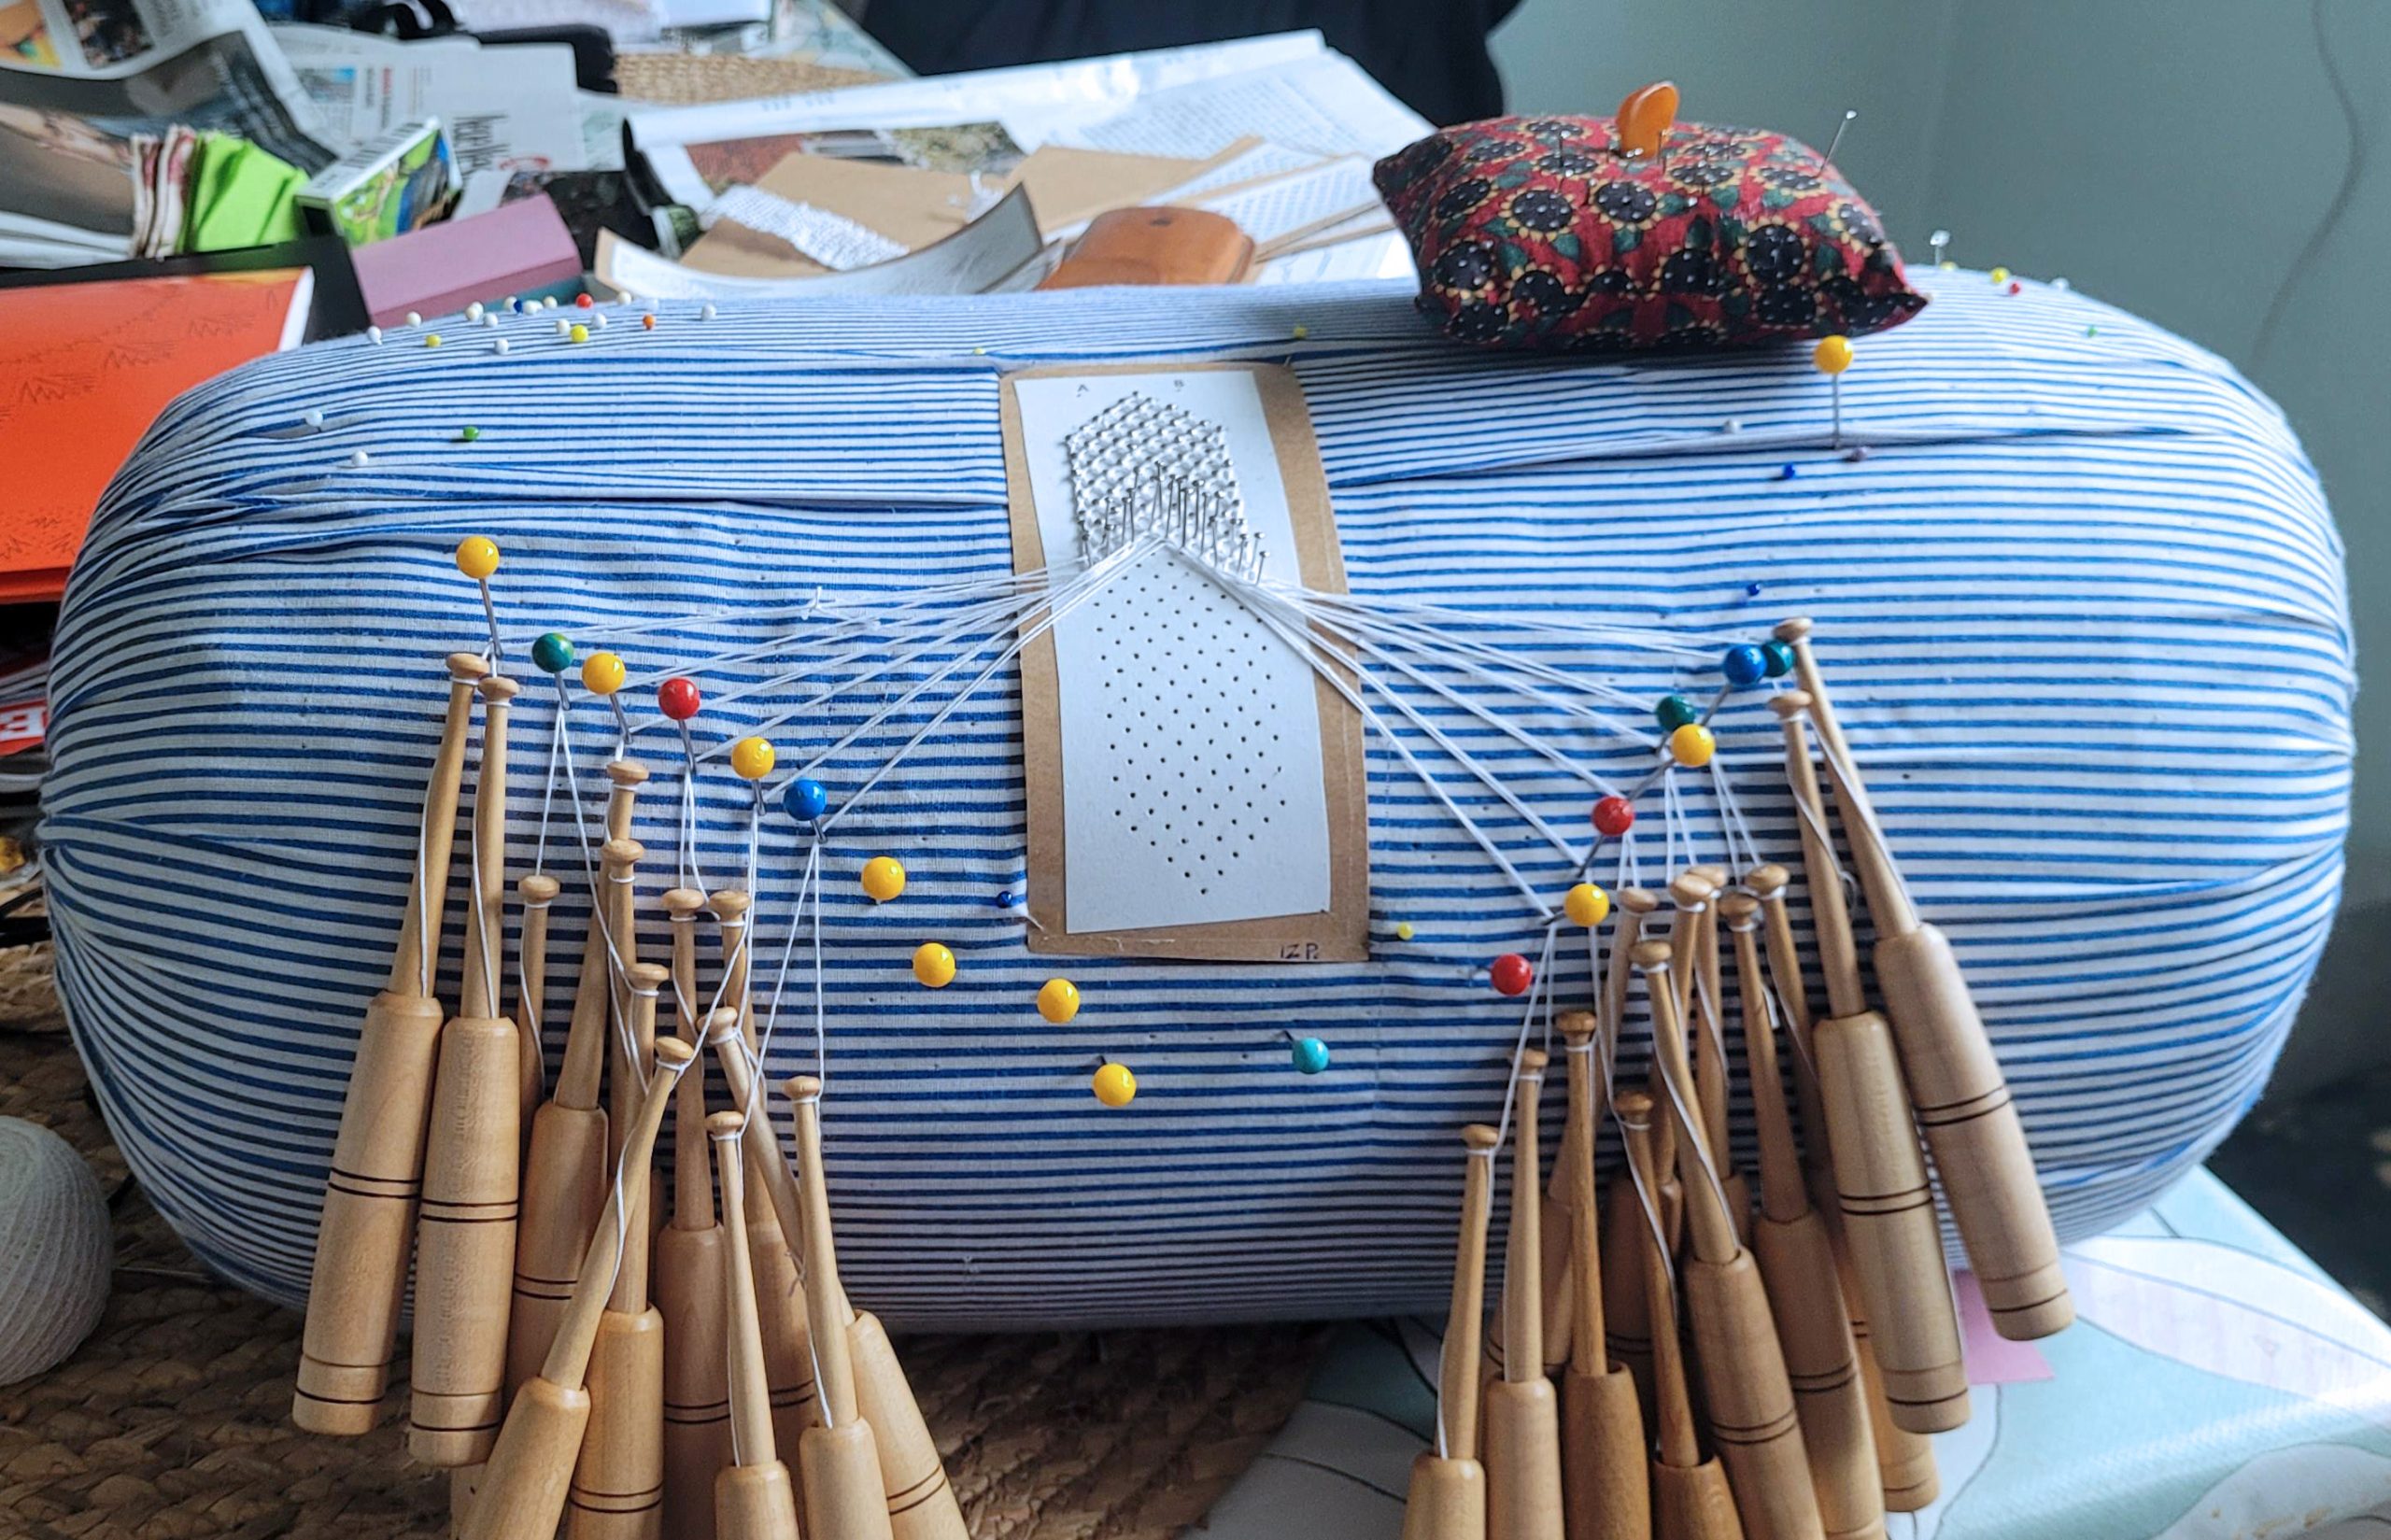
- A Pillow: This will depend on the regional style of bobbin lace you want to learn. German pillows are usually round, whereas many contemporary British lace-makers use a flat pillow. There are some guides on how to make your own pillow, but I would recommend buying one to begin with.
- Bobbins: There are a great many types of bobbins. They all have historic roots and regional preferences. Only later did I learn that they often are attuned to the type of lace you make with them: The styles of lace that require frequent threading of the bobbin through loops had thinner endings to make this easier. I decided on German-style bobbins (see top picture).
- Thread: To begin with, a thicker thread will make it easier to see the stitches (and the mistakes!). Once you understand how the movements work, and you don’t need the thread as a visual aid as much, you can switch to thinner threads and make finer lace. Some folks even work with metal threads to create jewelry or art pieces.
- Needles: So many needles! For every finished stitch, you may need a needle (depending on the style of lace). The size of the needle may show in the finished lace, so it’s worth thinking about it. Steel needles with flat tops are great, as you can pin them close together. Just make sure they are rust-free, as you wouldn’t want the needles to stain your thread.
- Tools: Scissors, of course, to cut thread. I also used large needles to keep my bobbins organized on the pillow, but this would not be necessary on a flat pillow. An awl can sometimes help to disentangle thread or re-thread a bobbin quicker.
- Paper: A print-out of a pattern, and ideally, a thin carton backing – you could use old cereal boxes, for example. It is just to stabilize the paper. Otherwise, it might rip with all the needles going through it. Some clear or lightly tinted foil can help protect the print-out and the thread (from printing ink transfer), and make it reusable.
Teaching myself Bobbin Lace
I got all the books from the library that were related to bobbin lace. Some of them had to be brought up from the repository, because no one had asked for them for so long.
While I waited for my ebay orders to arrive, I began reading and watching youtube videos on bobbin lace. When I closed my eyes in the evenings, I saw the diagrams: cross, twist, cross.
Bobbin lace only uses two movements: Cross and twist.
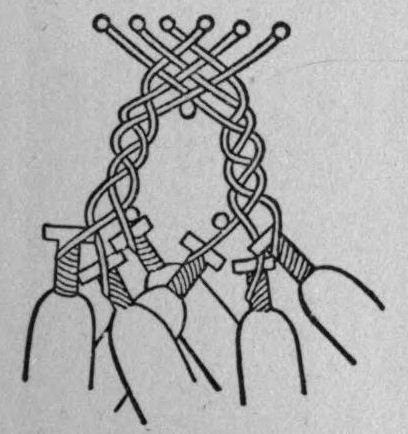
In the image above, you see the two foundational movements that make up every stitch: Cross and Twist. The first two threads are crossed: The right bobbin moved over the left one, crossing the two threads. Then, with four bobbins, the threads are twisted: The left-hand bobbins moved over the right ones, twisting the thread.
You only need those two movements to make lace!
The first thing that arrived was the pillow. Then, a few days later, I received the rest of my orders, and was finally able to assemble my first bobbin lace attempt!
Pretty much every textbook (or introductory video) will tell you to start with a simple, straight piece, such as this:
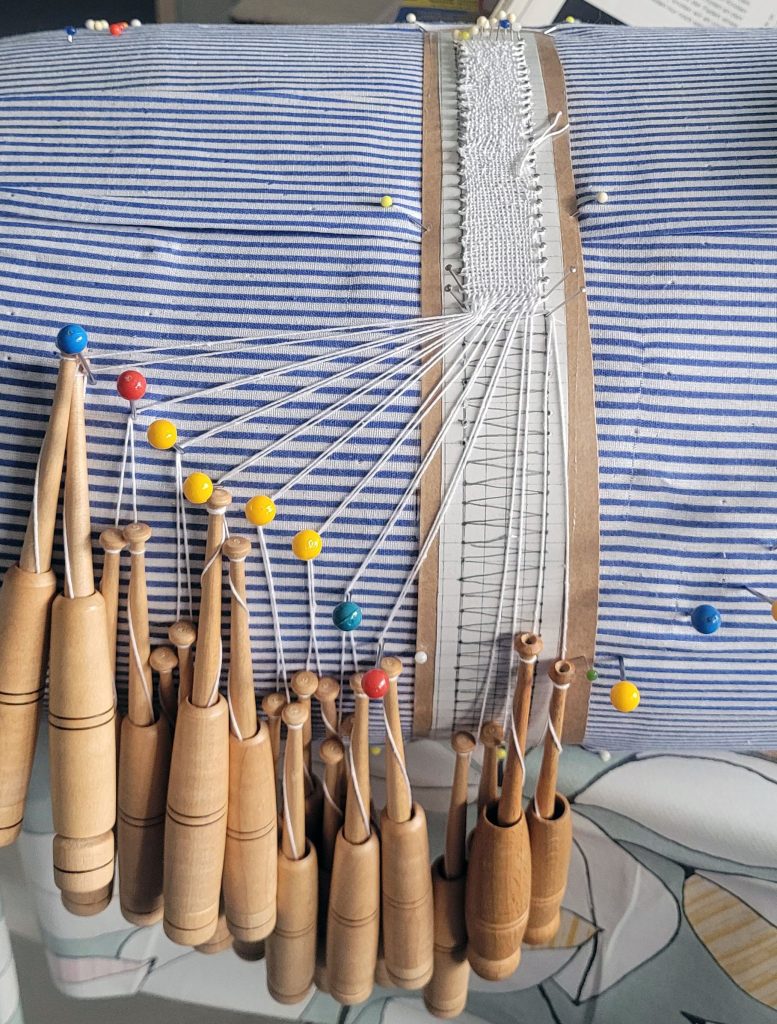
I drew this initial pattern myself on some quad-ruled paper.
You can really see how I am learning. At first, the ‘lace’ is uneven and jumbled. I’m making a lot of mistakes, and I’m not noticing them, at least not right away.
Slowly, the pattern is getting neater. You can really see how I’m understanding the way the stitches are supposed to be. I love this about crafting: Only by doing it yourself you really get an understanding of how it works. Your view changes; when you look at the pieces of crafting, you more easily see the way it is made, and perhaps how good the maker was!
Embodied Knowledge
The idea of “embodied knowledge” is around in a few fields these days. As an archaeologist, I am always interested in how things are made, and who made them. As a university teacher, we also think about ways to support our students through embodied knowledge. Sometimes, it is just easier to “learn by doing,” by trying something out and using our whole body.
Learning bobbin lace gave me a unique experience of “embodied knowledge.”
I had watched all those videos, and read all those introductory texts. Finally, I could try the stitches out myself. The German bobbins are grabbed from below, from behind the bobbins (whereas, for instance, most British bobbins are grabbed from above).
My hands immediately knew what to do.
I had never experienced that before. When I asked my mother to teach me knitting the year prior, I struggled at first to recreate the knit and purl movements. But with learning bobbin lace, my hands seemed to know exactly what they were doing right from the start.
As I practiced, my hands became better at doing the right stitches, and I did not need to watch them. Instead, I could watch the thread and the stitches closely to avoid mistakes. The sound of the bobbins became soothing, and I could switch to a finer thread after a few training pieces.
What I Love About Bobbin Lace
Sometimes, we just find something that gives us joy.
Making lace isn’t about making money, or becoming perfect. It’s tedious, time-consuming, and requires a moderate degree of patience.
I love learning more about bobbin lace because of it. I have thoroughly enjoyed every moment learning. Seeing my improvement has given me joy, and learning more about the history of lace has been equally fun.
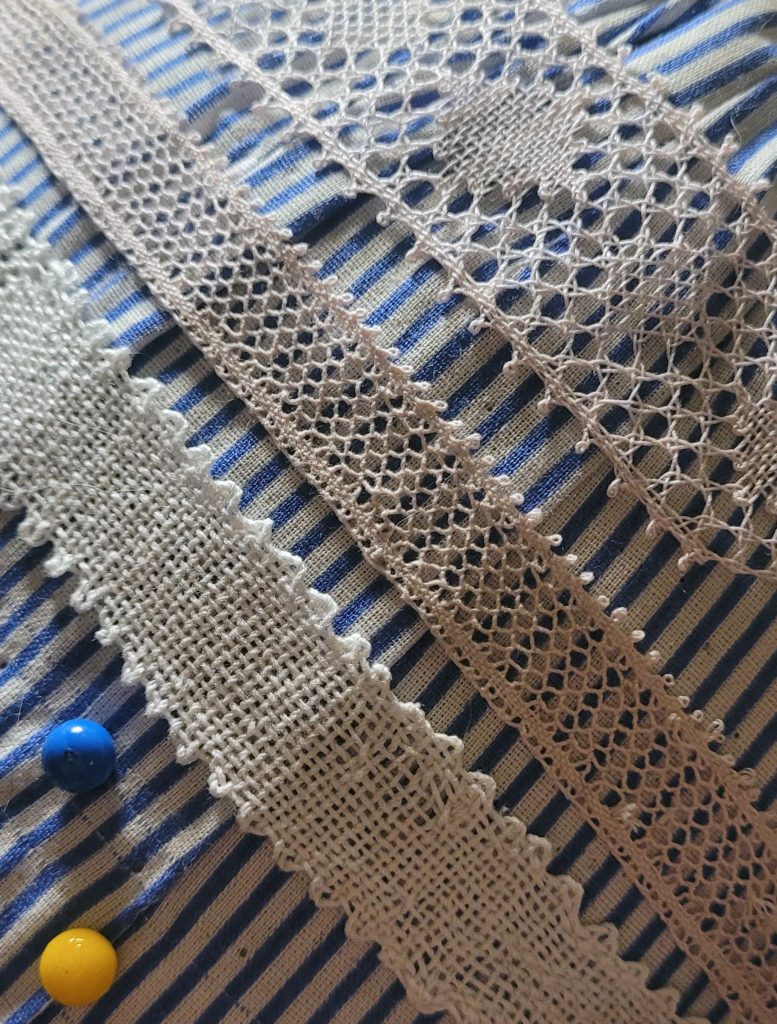
For example, look at these examples of historic lace:
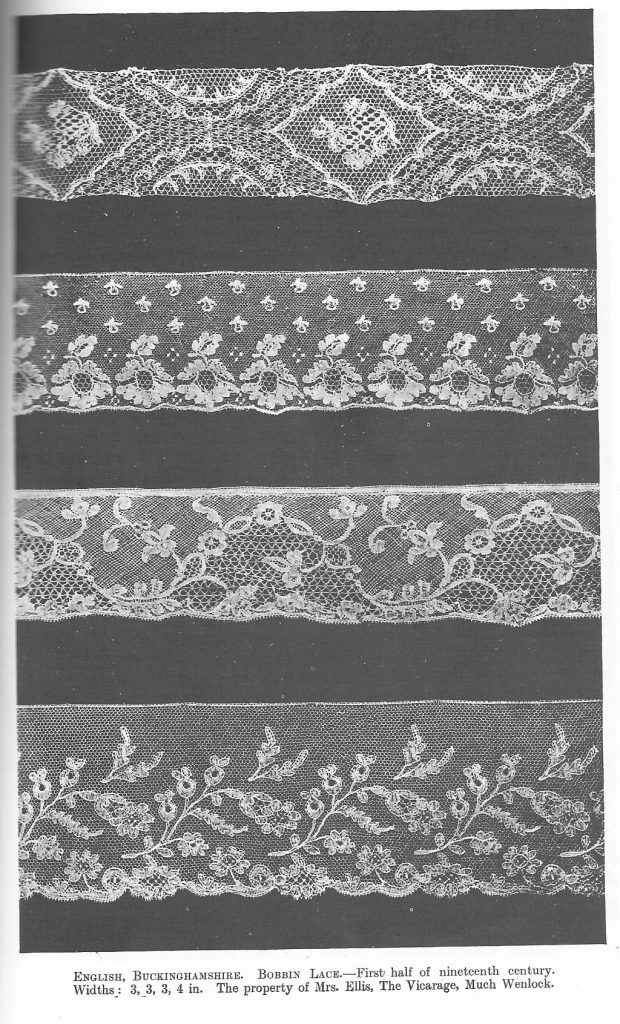
Someone made this; just one cross/twist at a time.
There are countless types of lace, some easier to learn than others. I’m still in the beginning of my lace journey, but I can already see how far I’ve come!
Have you ever come across hand-made lace? Did you know there are a few techniques to make lace? Bobbin lace is just one of them! Do you have any questions? Please comment!
x A
Leave a Reply